If you are around VMware software these days, you are probably hearing a lot about VMware Cloud Foundation (VCF). Well, that isn’t the only thing folks are deploying. Many around me are opting for VMware vSphere Foundation (VVF). You have a choice of deploying a greenfield instance with a new vCenter, or going brownfield by importing your current vCenter.
I decided to start up a video series on how to take a three-node vSphere 8 cluster and migrate it to VMware vSphere Foundation 9.0.1 using NFS storage. The bits were all acquired with my VMUG Advantage membership. For more information on how to get these bits for your lab (non production use only!) log on to https://www.vmug.com/membership/vmug-advantage-membership/
The first episode covers how to upgrade vCenter 8 to vCenter 9, how to use the VCF Installer appliance to deploy VMware vSphere Foundation (you heard that right). We also deploy VCF Operations and connect our newly upgraded vCenter 9 server to it. At the bottom of this post, I have a link to the YouTube video I made for part 1, as well as a link to part 2.
Anyone who has a vSphere 8 environment most likely has an environment with vCenter Server 8, and a few ESXi hosts running 8.0 as well. Fully upgrading to VVF 9 will require support for ESX 9.0 (ESXi isn’t a thing anymore!). Don’t forget to check out KB418259 from Broadcom on how to Upgrade to Latest ESXi and vCenter version 9. To make sure your systems are fully supported by Broadcom, please visit the new Broadcom | VMware | Hardware Compatibility Guide
The first thing we need to do is to upgrade our vCenter Server from 8.0.x to 9.0.x. Go ahead and download the newest vCenter 9 ISO from your portal if you are entitled to VMware vSphere Foundation.
Once you have the ISO downloaded, simply mount it as a virtual CD drive on your system that has line-of-sight access to your vCenter 8.0 Server, and more than likely at least one of your ESXi 8.0 hosts (especially if you are deploying a new appliance to an ESXi host that is managed by the vCenter you are upgrading. To launch the ISO, double-clicking it often does the trick. It should show up on your management server or desktop like this.
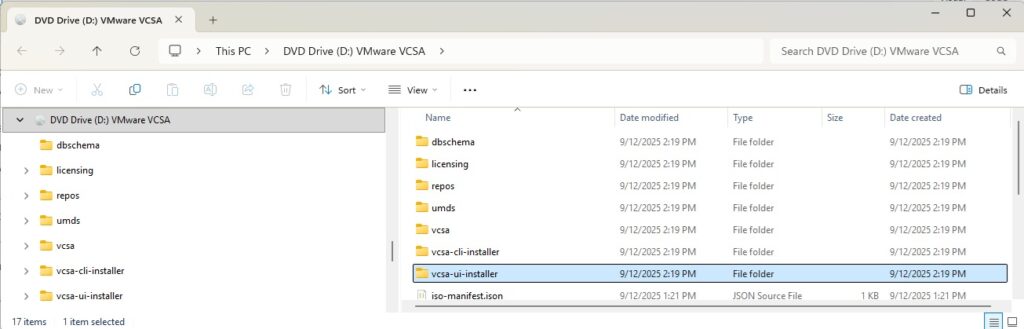
Launch the installer at ISODRIVE:/vcsa-ui-installer/win32/installer.exe
This will launch Stage 1 of the vCenter upgrade. A high-level list of activities will be:
Stage 1:
- Connect to source appliance (SSO username/Password and your root password will be required here)
- Choose where you want to deploy vCenter. Here is where you may want to pick an ESXi host if the host you are deploying to is managed by the vCenter you are upgrading. Additionally, you will want to turn DRS to manual or partially automated to prevent the vCenter VM from moving around unexpectedly.
- Name the VM and set a root password
- If you want the new appliance to have the same VM name as your old one, it might be a good idea to rename the old one ahead of time
- Additionally it is often advisable to svMotion the old appliance to a different datastore to rename the filesystem (recommended, but not required if deploying the new VM to a different datastore)
- Choose a deployment size, storage size and deployment datastore for your new VCSA appliance
- Choose your network settings. A couple tips:
- Make sure your port group binding is set to “Ephemeral – no binding”
- Give the installer a temporary IP address for the new appliance – make sure it has a valid DNS PTR record
- Stage 1 processed for 22 minutes in my case.
TIP: If you walk away, your installer could timeout. That’s OK! Simply connect to port TCP 5480 of the temporary IP address you gave the appliance and you will be able to continue with Stage 2 that way.
Stage 2:
- Once you begin, it will run some pre-upgrade checks (might take a few minutes)
- Some warnings could include
- If you have plugins or extensions that have been deprecated or are not supported on vCenter 9
- A suggestion to downgrade DRS from Fully Automated as recommended above
- The fact that Integrated Windows Authentication is deprecated
- Files that can’t be used with Lifecycle Manager will not be copied from the source (a good thing!)
- Select the data you want to migrate (choose one of these)
- Configuration and Inventory data
- Configuration, Inventory, Tasks and Events
- Configuration, Inventory, Tasks, Events and Performance Metrics
- Stage 2 processed for 31 minutes, although I migrated less than 3GB of data.
That should do it! It is up to you if you want to uncheck the setting to connect the old vCenter NIC at startup (just in case someone decides to power it up accidentally!)
It would be advisable to log on to your new vCenter server, check permissions, check for errors, and make sure things are working as expected. If you have a backup solution, maybe try backing up a VM! You know the drill.
Once that is done, you’ll be ready to import your vCenter Server to VVF using the VCF Installer appliance.
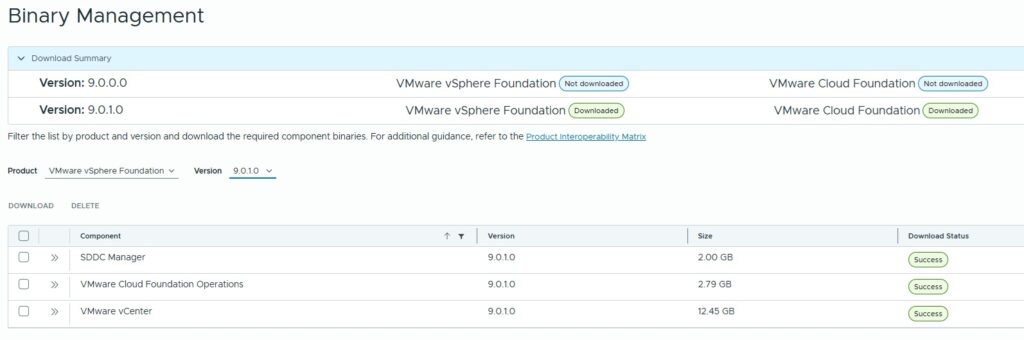
Set up your online depot using your Broadcom account, or you can also set up an Offline Depot. There are a lot of great blogs out there on how to do that. Under Binary Management, make sure you have downloaded all the required components for VMware vSphere Foundation.
Some things to make sure of in advance include:
- Make sure your VCSA 9 root password is 15 characters or more
- Make sure you do not have any standard vSwitches. It doesn’t matter if you don’t have any uplinks on them. You’ll want them deleted. If anything is using them, migrate those workloads to distributed vSwitches.
- Make sure you have turned fully automated DRS back on
- Make sure your cluster is set to vSphere Lifecycle Manager (vLCM) image based. If you are still using baselines, capture an image from one of your hosts and move to image based.
Once you have these done, you can deploy. To start, you will select whether or not you deploy a new vCenter (Greenfield) or import a vCenter (Brownfield). We did our upgrade for the “Brownfield” option so we will check the box that we have one.
Next, select an appliance size for VCF Operations, choose the FQDN for it, and assign an admin and root password. Lastly, validate and deploy will begin!
Deployment of VCF Operations took me 24 minutes.
The last step is to launch VCF Operations create a credential and add a vCenter Account to integrate VCF Operations with your new vCenter server!
Once again, the YouTube that does all of this is located at: vSphere 8 to VVF 9 Migration – Part 1
In the next episode, we will be upgrading our ESXi hosts and getting everything up to ESX9 support! There is a YouTube video for that within the blog post as well.
Thx for reading!
One thought on “vSphere 8 to VVF 9 Migration – Part 1 – vCenter 9 upgrade, VCF Operations Deployment”